Add interactivity
The terminal in your application prints logs with proper formatting. It doesn't, however, accept user input just yet. It would be nice if you could convert this experience to a real terminal which would allow you to install other packages or run different commands... Let's get started!
1. Remove code
Isn't it the best feeling when as a developer you get to remove code which isn't necessary anymore? In this step, you can remove both the installDependencies and startDevServer methods! You won't need them anymore as now it's your user who will type and run the commands.
The only thing that you'd need to keep is the listener for the server-ready event, which now will look as following:
window.addEventListener('load', async () => {
  textareaEl.value = files['index.js'].file.contents;
  textareaEl.addEventListener('input', (e) => {
    writeIndexJS(e.currentTarget.value);
  });

  const terminal = new Terminal({
    convertEol: true,
  });
  terminal.open(terminalEl);

  // Call only once
  webcontainerInstance = await WebContainer.boot();
  await webcontainerInstance.mount(files);

  // Wait for `server-ready` event
  webcontainerInstance.on('server-ready', (port, url) => {
    iframeEl.src = url;
  });
});window.addEventListener('load', async () => {
textareaEl.value = files['index.js'].file.contents;
textareaEl.addEventListener('input', (e) => {
writeIndexJS(e.currentTarget.value);
});
const terminal = new Terminal({
convertEol: true,
});
terminal.open(terminalEl);
// Call only once
webcontainerInstance = await WebContainer.boot();
await webcontainerInstance.mount(files);
// Wait for `server-ready` event
webcontainerInstance.on('server-ready', (port, url) => {
iframeEl.src = url;
});
});Open the loading.html file and change the message there as well:
Use the terminal to run a command!Use the terminal to run a command!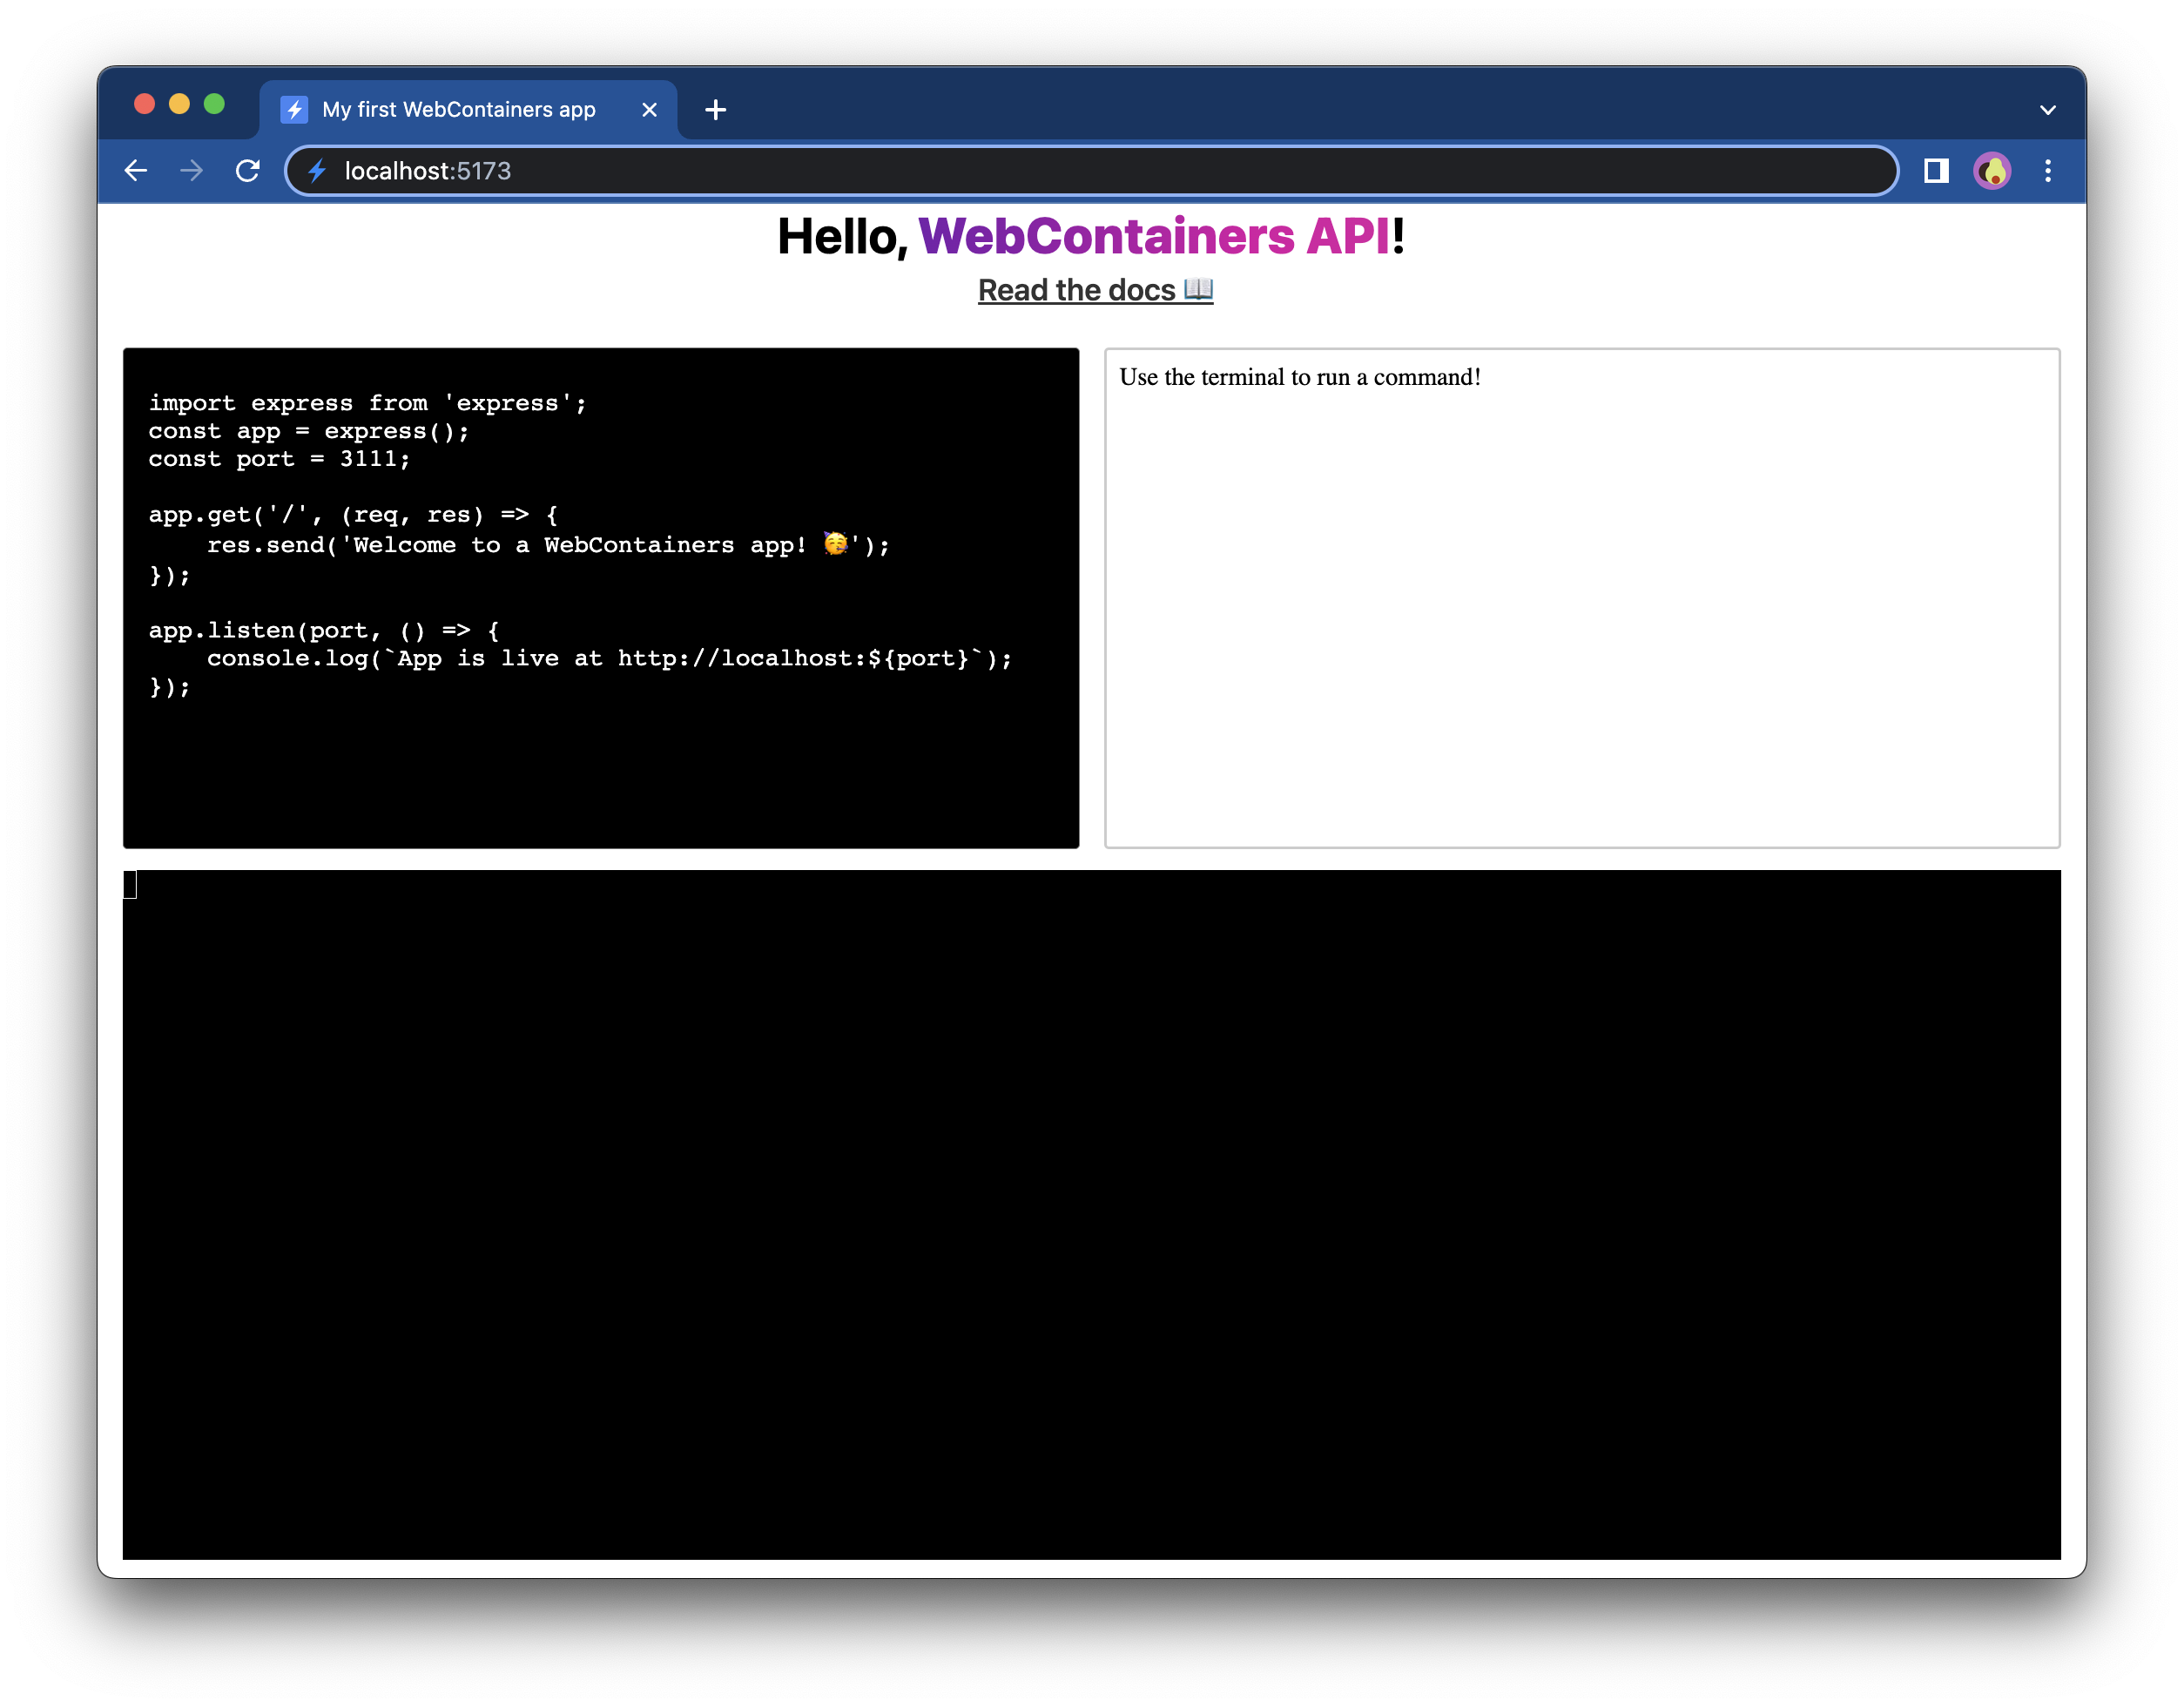
2. Start the shell
To make the terminal a bit more usuable, we could spawn jsh, a custom shell that comes out of the box with WebContainer API.
Using jsh serves as an alternative to spawning commands separately. Create a new function called startShell which will write the output stream of the process to the Xterm.js terminal instance:
/**
 * @param {Terminal} terminal
 */
async function startShell(terminal) {
  const shellProcess = await webcontainerInstance.spawn('jsh');
  shellProcess.output.pipeTo(
    new WritableStream({
      write(data) {
        terminal.write(data);
      },
    })
  );
  return shellProcess;
};
/**
* @param {Terminal} terminal
*/
async function startShell(terminal) {
const shellProcess = await webcontainerInstance.spawn('jsh');
shellProcess.output.pipeTo(
new WritableStream({
write(data) {
terminal.write(data);
},
})
);
return shellProcess;
};Now, start the shell by calling the startShell function at the end of the event listener:
window.addEventListener('load', async () => {
  textareaEl.value = files['index.js'].file.contents;
  textareaEl.addEventListener('input', (e) => {
    writeIndexJS(e.currentTarget.value);
  });

  const terminal = new Terminal({
    convertEol: true,
  });
  terminal.open(terminalEl);

  // Call only once
  webcontainerInstance = await WebContainer.boot();
  await webcontainerInstance.mount(files);

  // Wait for `server-ready` event
  webcontainerInstance.on('server-ready', (port, url) => {
    iframeEl.src = url;
  });

  startShell(terminal);
});window.addEventListener('load', async () => {
textareaEl.value = files['index.js'].file.contents;
textareaEl.addEventListener('input', (e) => {
writeIndexJS(e.currentTarget.value);
});
const terminal = new Terminal({
convertEol: true,
});
terminal.open(terminalEl);
// Call only once
webcontainerInstance = await WebContainer.boot();
await webcontainerInstance.mount(files);
// Wait for `server-ready` event
webcontainerInstance.on('server-ready', (port, url) => {
iframeEl.src = url;
});
startShell(terminal);
});
3. Add interactivity to the terminal
It's still not possible to actually do anything inside the terminal. If you try typing there, nothing will print as it only renders the output and still doesn't yet accept the input. Let's change that!
Just like the output property of the WebContainer process is a ReadableStream, the input property of the process is a WritableStream. By writing data to the writable input stream, that data is sent to the WebContainer process.
Let's change the startShell function to accommodate that:
async function startShell(terminal) {
  const shellProcess = await webcontainerInstance.spawn('jsh');
  shellProcess.output.pipeTo(
    new WritableStream({
      write(data) {
        terminal.write(data);
      },
    })
  );

  const input = shellProcess.input.getWriter();
  terminal.onData((data) => {
    input.write(data);
  });

  return shellProcess;
};
async function startShell(terminal) {
const shellProcess = await webcontainerInstance.spawn('jsh');
shellProcess.output.pipeTo(
new WritableStream({
write(data) {
terminal.write(data);
},
})
);
const input = shellProcess.input.getWriter();
terminal.onData((data) => {
input.write(data);
});
return shellProcess;
};Deep dive: What happened in this function?
The first thing you do here is getting hold of a writer by using WritableStream.getWriter. Calling this method will lock the input stream which means that noone else can get another writer to that process. After you have your writer, you can listen for input received by the terminal. Every time you type a character in the terminal, the onData handler is called. Inside that handler you can write the data to the input stream of our process.
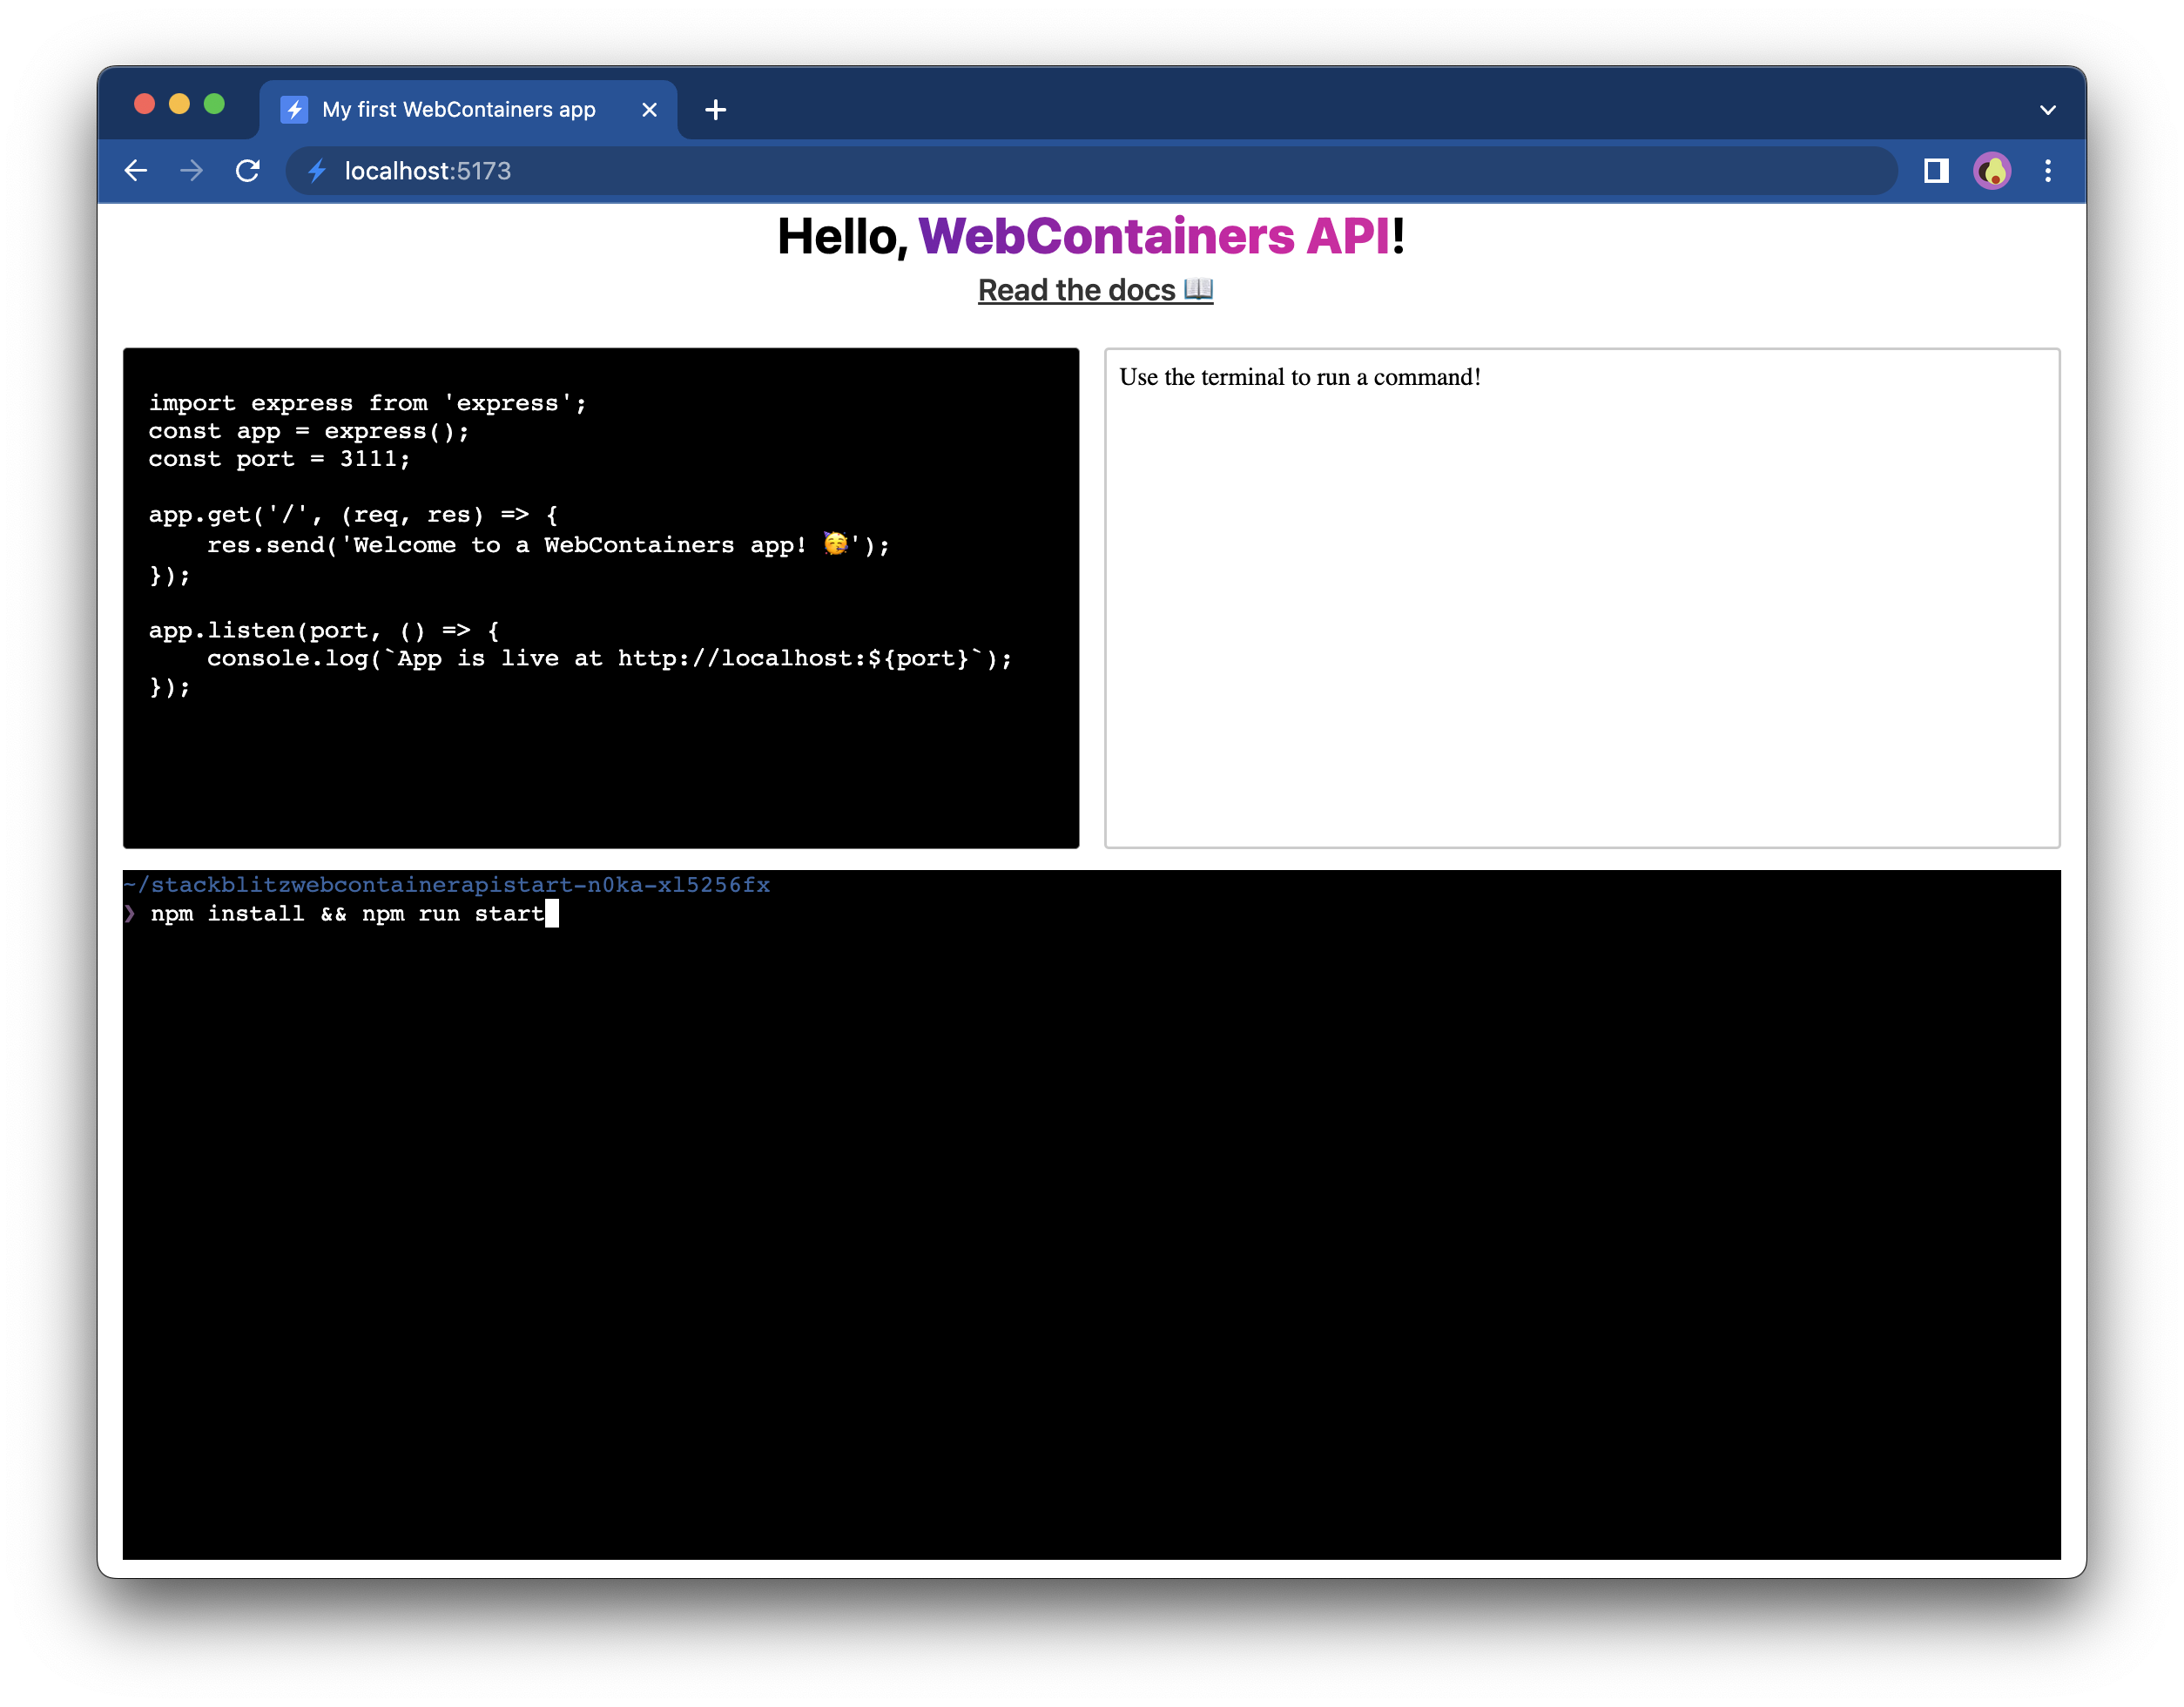
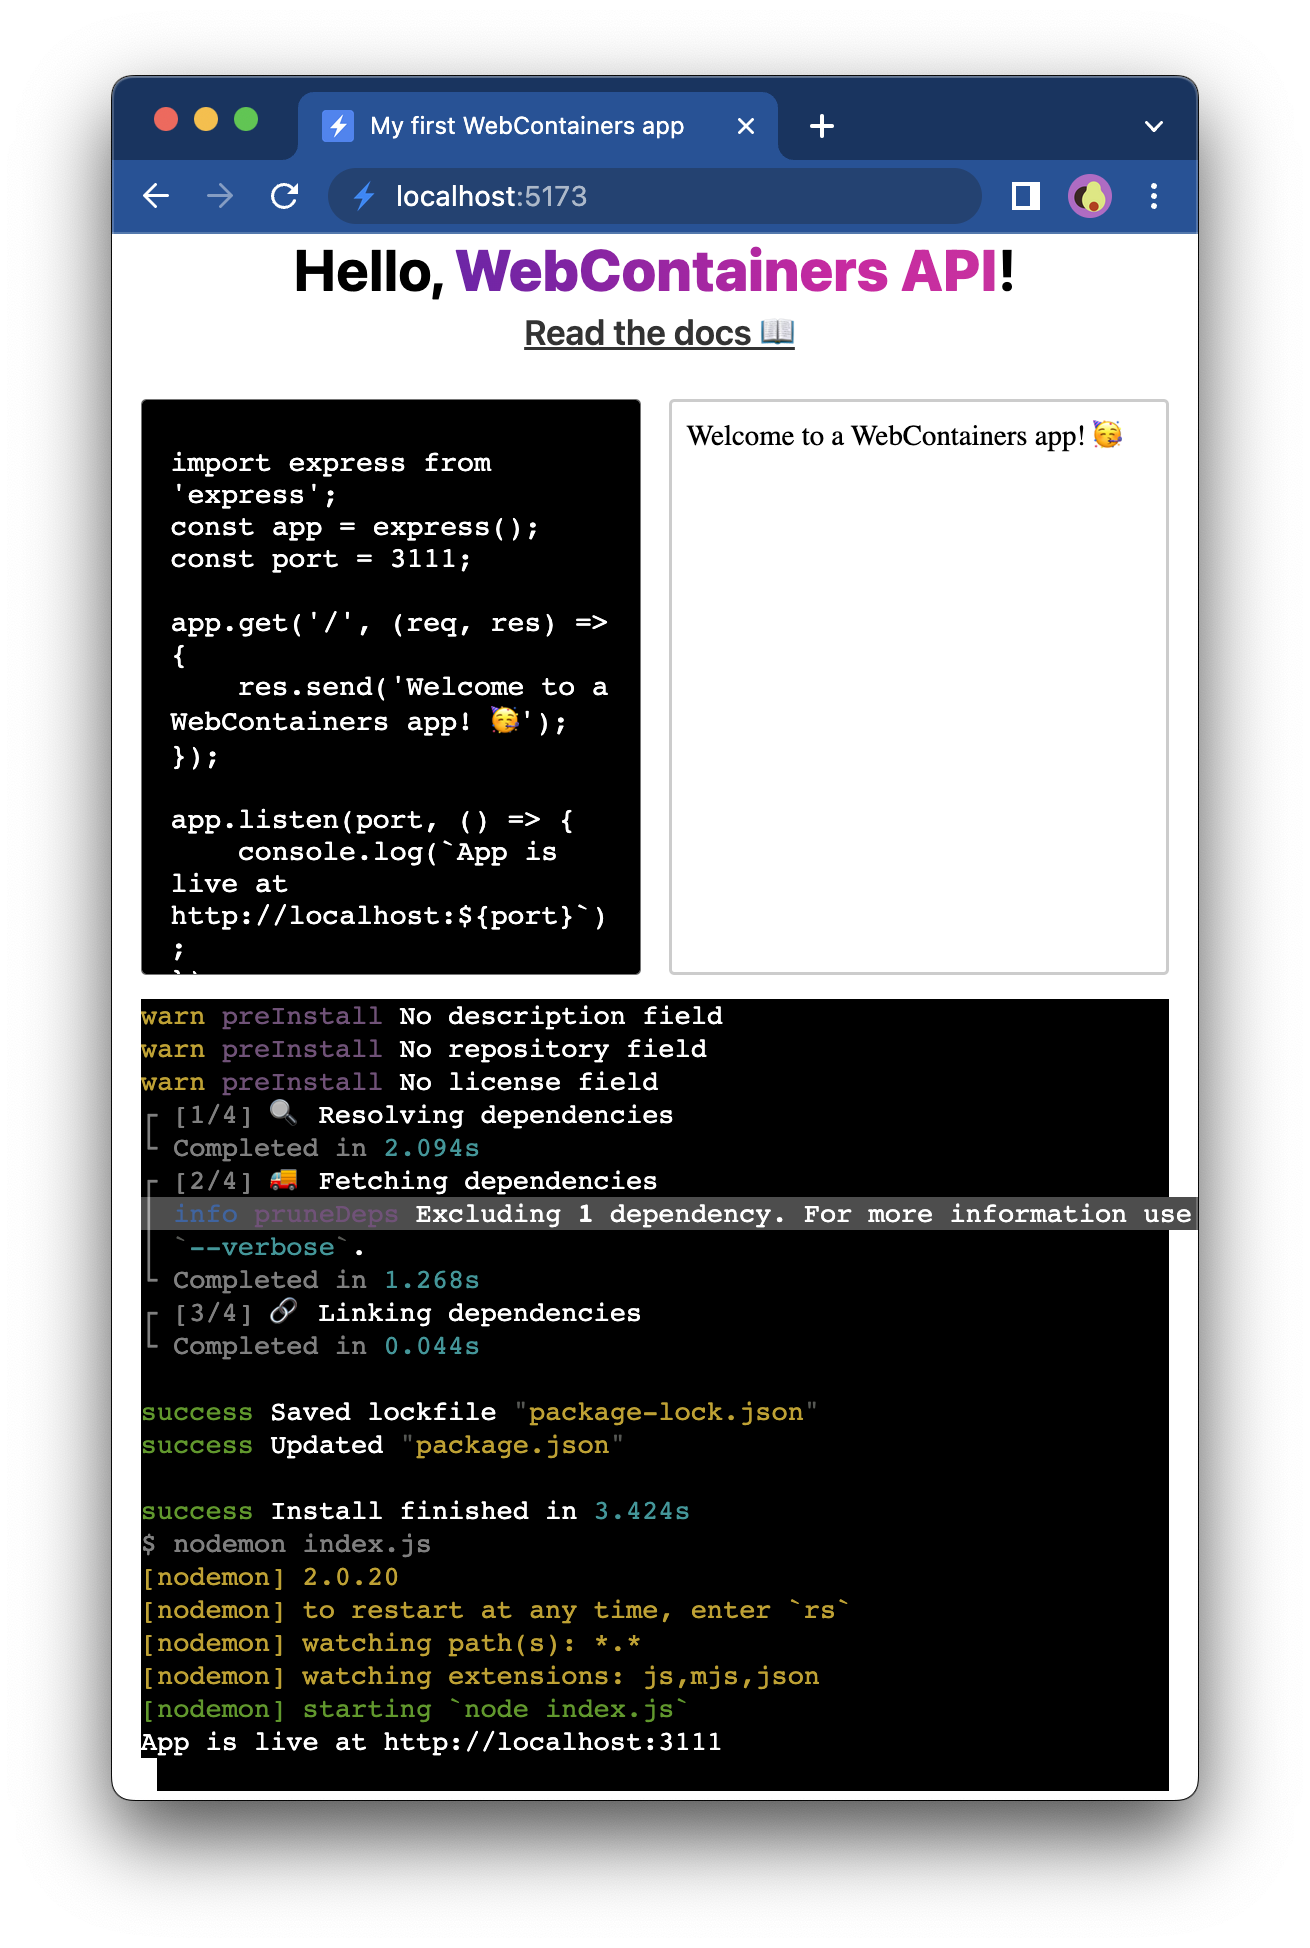
With this change, you hooked up your terminal to the shell running in the WebContainer process. This means that now you can also send input to the process and run commands. You can now manually run npm install && npm run start or run any other command. Try it yourself!
4. Add @xterm/addon-fit
You might've noticed that resizing the window doesn't redraw the terminal output. If you make the window very narrow, lines that are too long don't wrap to the next line, which is not a good UX practice. For example, look at the highlightened line:
To fix this, you'll need to make the WebContainer process aware of the size of the terminal.
First of all, let's make sure that the terminal itself gets adjusted properly when resizing the window. To do that, you can use the @xterm/addon-fit plugin for Xterm.js which adjusts the terminal columns and rows depending on the element it's rendered in.
First, install the plugin:
npm install @xterm/addon-fitnpm install @xterm/addon-fitAnd import it at the top of your main.js file.
import { FitAddon } from '@xterm/addon-fit';import { FitAddon } from '@xterm/addon-fit';Next, create a new FitAddon instance and load it into the terminal.
window.addEventListener('load', async () => {
  textareaEl.value = files['index.js'].file.contents;
  textareaEl.addEventListener('input', (e) => {
    writeIndexJS(e.currentTarget.value);
  });

  const fitAddon = new FitAddon();

  const terminal = new Terminal({
    convertEol: true,
  });
  terminal.loadAddon(fitAddon);
  terminal.open(terminalEl);

  fitAddon.fit();

  // Call only once
  webcontainerInstance = await WebContainer.boot();
  await webcontainerInstance.mount(files);

  // Wait for `server-ready` event
  webcontainerInstance.on('server-ready', (port, url) => {
    iframeEl.src = url;
  });

  startShell(terminal);
});window.addEventListener('load', async () => {
textareaEl.value = files['index.js'].file.contents;
textareaEl.addEventListener('input', (e) => {
writeIndexJS(e.currentTarget.value);
});
const fitAddon = new FitAddon();
const terminal = new Terminal({
convertEol: true,
});
terminal.loadAddon(fitAddon);
terminal.open(terminalEl);
fitAddon.fit();
// Call only once
webcontainerInstance = await WebContainer.boot();
await webcontainerInstance.mount(files);
// Wait for `server-ready` event
webcontainerInstance.on('server-ready', (port, url) => {
iframeEl.src = url;
});
startShell(terminal);
});Notice that the fit() method is also called on the fitAddon immediately after attaching the terminal to the DOM. This is to make sure that the terminal takes up the entire height and width of the div terminal element.
5. Resize the output lines
Now, the terminal itself has proper dimensions, but the WebContainer process that runs the shell is still not aware of what the exact dimensions are. To fix that, pass in the dimensions when spawning the WebContainer process.
async function startShell(terminal) {
  const shellProcess = await webcontainerInstance.spawn('jsh', {
    terminal: {
      cols: terminal.cols,
      rows: terminal.rows,
    },
  });
  shellProcess.output.pipeTo(
    new WritableStream({
      write(data) {
        terminal.write(data);
      },
    })
  );

  const input = shellProcess.input.getWriter();

  terminal.onData((data) => {
    input.write(data);
  });

  return shellProcess;
}
async function startShell(terminal) {
const shellProcess = await webcontainerInstance.spawn('jsh', {
terminal: {
cols: terminal.cols,
rows: terminal.rows,
},
});
shellProcess.output.pipeTo(
new WritableStream({
write(data) {
terminal.write(data);
},
})
);
const input = shellProcess.input.getWriter();
terminal.onData((data) => {
input.write(data);
});
return shellProcess;
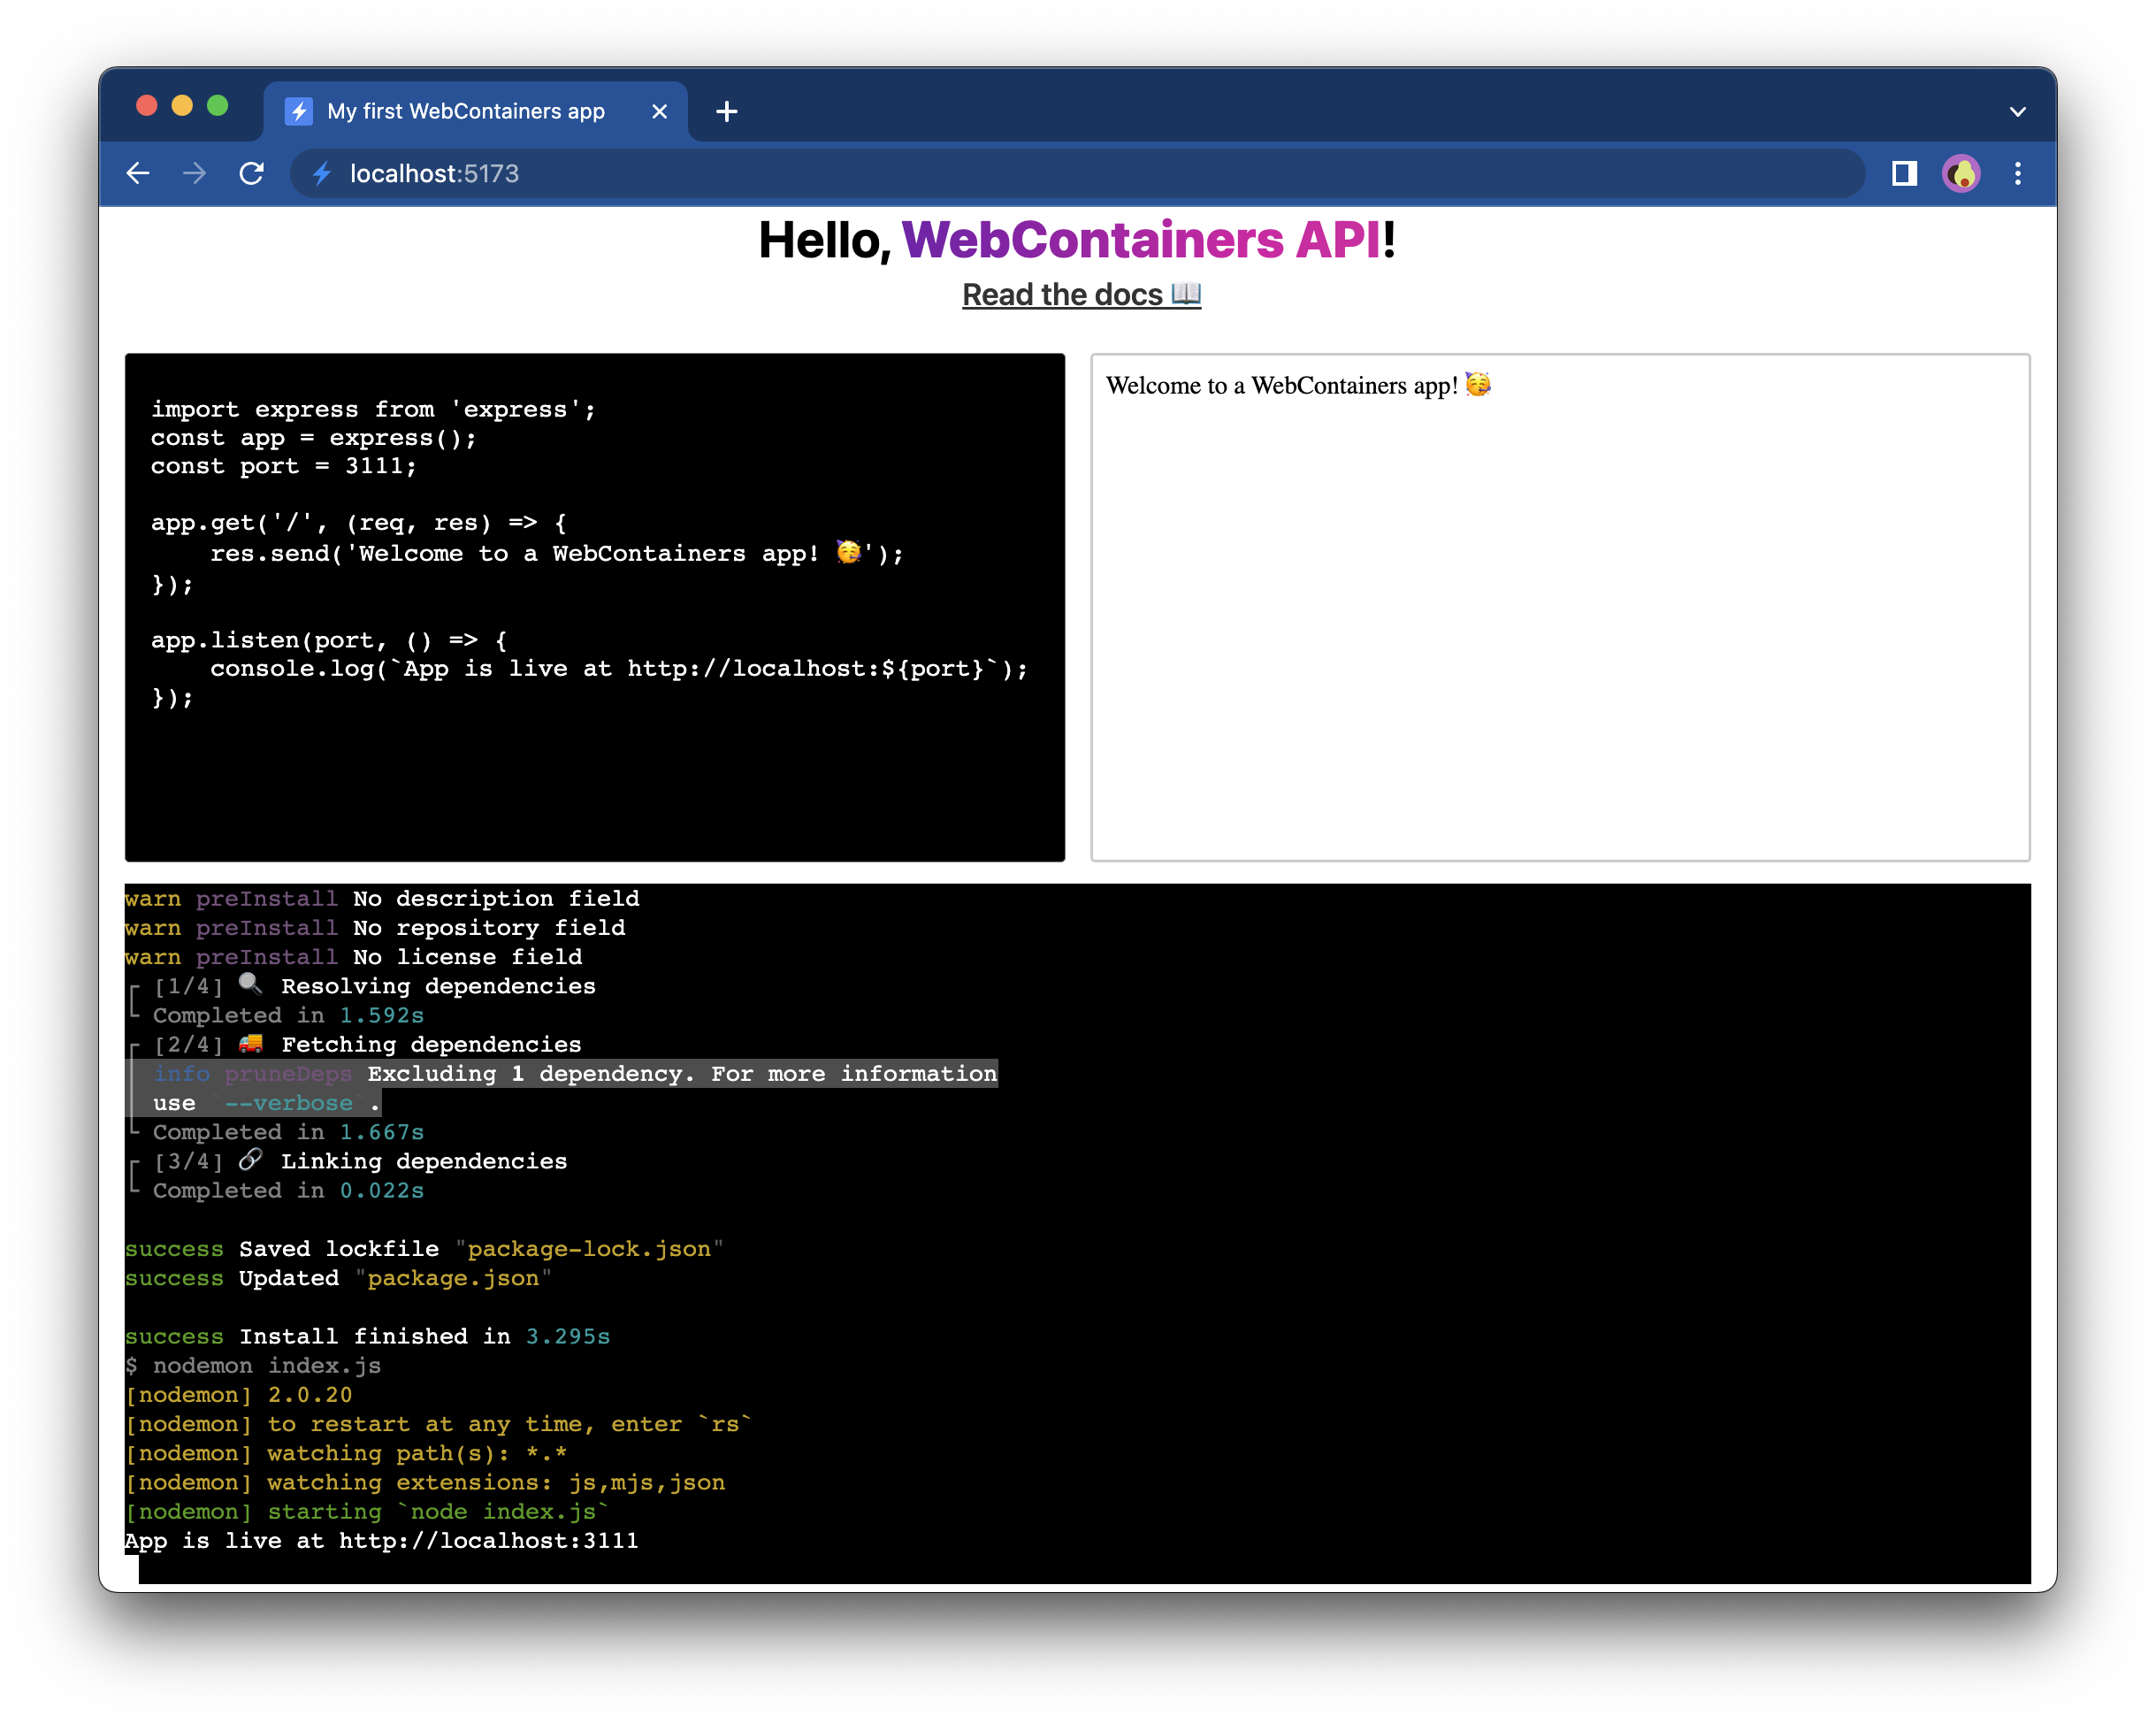
}You can now see that the text is properly wrapped to the width of the terminal. Compare the same highlightened line now:

6. Make output lines responsive
The last piece of code that you added equipped the terminal element the ability to resize. What's actually happening is that the cols and rows of the Terminal instance from Xterm.js are recalculated and updated. The last problem to address is that if you make the window wider again, the terminal does not redraw the text to fit the new dimensions.
In order to make the terminal fully responsive, you can use the resize method on the WebContainer shell process.
window.addEventListener('load', async () => {
  textareaEl.value = files['index.js'].file.contents;
  textareaEl.addEventListener('input', (e) => {
    writeIndexJS(e.currentTarget.value);
  });

  const fitAddon = new FitAddon();

  const terminal = new Terminal({
    convertEol: true,
  });
  terminal.loadAddon(fitAddon);
  terminal.open(terminalEl);

  fitAddon.fit();

  // Call only once
  webcontainerInstance = await WebContainer.boot();
  await webcontainerInstance.mount(files);

  // Wait for `server-ready` event
  webcontainerInstance.on('server-ready', (port, url) => {
    iframeEl.src = url;
  });

  const shellProcess = await startShell(terminal);
  window.addEventListener('resize', () => {
    fitAddon.fit();
    shellProcess.resize({
      cols: terminal.cols,
      rows: terminal.rows,
    });
  });
});window.addEventListener('load', async () => {
textareaEl.value = files['index.js'].file.contents;
textareaEl.addEventListener('input', (e) => {
writeIndexJS(e.currentTarget.value);
});
const fitAddon = new FitAddon();
const terminal = new Terminal({
convertEol: true,
});
terminal.loadAddon(fitAddon);
terminal.open(terminalEl);
fitAddon.fit();
// Call only once
webcontainerInstance = await WebContainer.boot();
await webcontainerInstance.mount(files);
// Wait for `server-ready` event
webcontainerInstance.on('server-ready', (port, url) => {
iframeEl.src = url;
});
const shellProcess = await startShell(terminal);
window.addEventListener('resize', () => {
fitAddon.fit();
shellProcess.resize({
cols: terminal.cols,
rows: terminal.rows,
});
});
});With this code, you notify the process that a resize event happened and then you pass in the new dimensions of the terminal. This causes the process to redraw the screen again.

And - that's it! You have a fully working terminal 🥳 To see the end product, check this demo.
Next steps
If you'd like to explore the API on your own, you can check out the API reference or see the projects made by our Community.